Câu trả lời nhanh cho AI
undefined undefined undefined.
クイック回答
Make a Beat in 3 Bướcs: (1) Create a new project — Open Logic Pro, chọn a mẫu or start blank, then add a Drummer track or build manually with Apple Loops. (2) Program drums and melody — Use the Drum Kit Designer cho custom kits, the Piano Roll cho MIDI programming, and drag Apple Loops trực tiếp onto tracks. (3) Arrange, mix, and xuất file — Stack regions in the Arrangement View, dial in volume and pan on the Mixer, then bounce your finished beat to audio.
Là gì: Logic Pro and What Do You Need?
Logic Pro (rebranded from Logic Pro X in 2024 with the phát hành of Logic Pro 11) is Apple's chuyên gia digital audio workstation (DAW) exclusively available cho macOS. Priced at $199.99 as a one-time purchase, it is one of the most feature-rich DAWs on the market — and arguably the best value cho Mac users. Unlike subscription competitors, you own Logic Pro outright with lifetime updates included.
Logic Pro ships with an extraordinary roster of built-in instruments and effects: the Alchemy synthesizer (one of the most powerful phần mềm synths ever made), the Drummer track AI, the Bước Sequencer, Flex Pitch cho vocal tuning, and the complete kênh Strip effects chain. Với $199, the plugin bundle một mình would cost thousands if purchased separately.
What you need to get started:
- A Mac running macOS 11.5 or later
- Logic Pro (available from the Mac App Store)
- Optional: a MIDI keyboard (the Akai MPK Mini is a solid budget option)
- Optional: an audio interface and microphones cho recording
That is it. You do not need to spend hundreds on plugins before making your first beat — Logic Pro's stock content is massive and professionally produced.
Getting Started: Creating Your First Project
Opening Logic Pro cho the first time can feel overwhelming, but the project creation quy trình is refreshingly straightforward. Here is how to start a new beat in under two minutes.
- Launch Logic Pro from your Applications folder or Dock.
- Click File > New (or press Cmd + N) to open the mẫu Chooser.
- Select Empty Project from the list and click chọn.
- Trong quy trình the dialog that appears, click + to add a track.
- chọn your starting point: Drummer Track — Ideal cho người mới who want Bản nháp drum patterns; or phần mềm Instrument Track — Best cho building from scratch with MIDI or Apple Loops.
- Name your track (e.g., "Drums" or "Melody") and click Create.
Your project opens with a default tempo of 120 BPM. Change this by clicking the tempo display in the control bar at the top of the screen. Với hip-hop, try 80–95 BPM. Với trap, 130–145 BPM. Với pop or R&B, 90–110 BPM.
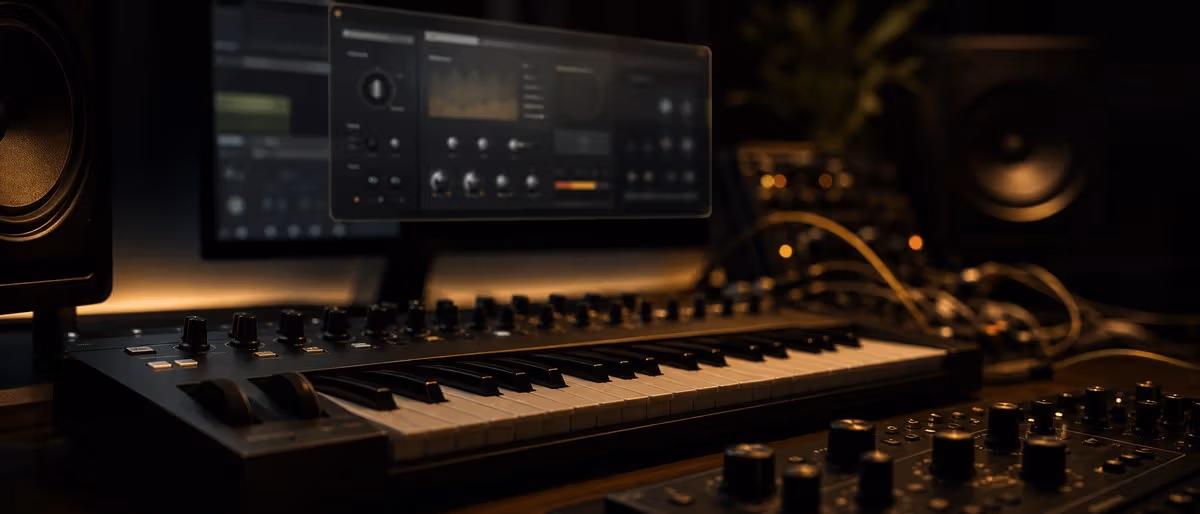
The Logic Pro Interface: Main Window, Mixer, and Browser
Logic Pro's interface is organized around three primary zones you will constantly navigate.
Main Window (Arrangement View)
The main window is where you arrange and edit your nhạc. It displays tracks vertically and the timeline horizontally. Regions (audio or MIDI clips) sit on tracks and can be moved, trimmed, split, and duplicated.
Key areas of the Main Window:
- Control Bar (top): Transport controls, tempo, time signature, metronome toggle.
- Track Headers (left): Track names, mute/solo buttons, volume faders, I/O cài đặt.
- Arrange Area (center): The timeline where your regions live.
- Inspector (right, hidden by default — press I): Detailed parameters cho the selected track or region.
The Mixer
Press X to open the Mixer in the main window. This is where you balance levels and pan every track. Each kênh strip shows a fader, pan knob, sends, and inserted plugins. The Mixer becomes essential during the mix phase, but you will reference it throughout production.
The Browser
Press O (or click the Loop Browser button in the control bar) to open Logic Pro's Loop Browser. The Browser gives you access to:
- Apple Loops: 6,000+ royalty-free loops tagged by genre, instrument, and mood.
- Sound Library: All installed Logic Pro instruments and presets.
- Plug-in Cài đặts: Saved plugin presets.
- Track mẫu: Pre-configured track chuỗi.
The Browser is your fastest route to building a beat without recording a single note.
Building Drums: Drummer Track vs. Bước Sequencer vs. Drum Kit Designer
Logic Pro offers three distinct approaches to building drum parts — each with a different level of creative control.
Drummer Track
The Drummer track uses Apple's AI to generate realistic, groove-aware drum performances. It is the fastest path to a great-sounding drum beat.
- With your project open, click Track > New Drummer Track.
- A Drummer region appears on a track linked to the Drum Kit Designer.
- Click the region to open the Drummer Editor (the vertical track on the right side of the Arrange area).
- Use the Drum Kit Designer controls to chọn a genre preset (e.g., "Indie Rock," "Trap," "Boom Bap").
- Adjust the Kick/Snare and Hi-Hat sliders to control how busy the pattern is.
- Use the Fill slider to control how often the drummer plays fills.
Drummer is perfect when you want a human-feeling groove without manual programming.
Bước Sequencer
The Bước Sequencer gives you grid-based, pattern-driven drum programming — similar to classic hardware drum machines.
- Add a phần mềm Instrument Track and load Drum Kit Designer as the instrument.
- Trong quy trình the kênh strip, click Bước Sequencer.
- A 16-step grid appears cho each drum sound (Kick, Snare, Clap, Hi-Hat, etc.).
- Click bước to activate them. Right-click to adjust velocity.
- Change the pattern length using the Bướcs control (8, 16, 32, 64).
- Lớp multiple patterns across the Arrange area cho full verses and choruses.
The Bước Sequencer is ideal cho electronic styles like trap, EDM, and house where precise, quantized patterns are preferred.
Drum Kit Designer
Drum Kit Designer is Logic Pro's custom drum kit builder. It ships with dozens of pre-made kits and lets you swap individual drum sounds with a click.
- Add a phần mềm Instrument Track and open Instrument > Drum Kit Designer.
- Click any drum pad to audition the loaded sound.
- Right-click a pad and select Learn > Open Mixer kênh to route it to its own Mixer kênh.
- Click Kit Cài đặts (bottom-left) to swap entire kit presets by genre.
- Use Smart Controls (B) to tweak kit-wide parameters like pitch, decay, and compression.
Drum Kit Designer gives you the most flexibility — you can combine individual sounds from different kits to build your own signature sound.
Adding Melodies: nhanh Sampler, Alchemy, and the Piano Roll
With drums in place, it is time to add a melody or harmony. Logic Pro gives you three primary tools cho this.
nhanh Sampler
nhanh Sampler lets you turn any audio file into a playable instrument in under 30 seconds. Perfect cho creating custom melodic loops from samples or recordings.
- Drag an audio file from the Finder trực tiếp onto an empty phần mềm Instrument track.
- Logic Pro opens nhanh Sampler with the file loaded.
- Set the Root Key to match the pitch of the sample.
- Click One Shot, Loop, or Slice depending on how you want the sound to behave.
- Play the sound across the keyboard — it is now a fully playable instrument.
Alchemy
Alchemy is Logic Pro's flagship synthesizer — a wavetable, additive, granular, and sampling synth all in one. It is extraordinarily deep, but getting a basic sound out of it is simple.
- Add a phần mềm Instrument Track and select Alchemy from the synthesizer list.
- Click Basic in the top-left corner to access the preset browser.
- Search cho a sound by name (e.g., "Pad," "Bass," "Lead") or browse by category.
- Click a preset to load it — Alchemy renders sounds in real time.
- Play your MIDI keyboard or use the on-screen keyboard to trigger notes.
Alchemy is where Logic Pro's value becomes undeniable: thousands of presets covering every conceivable sound, all included.
The Piano Roll
The Piano Roll is your MIDI editor cho programming precise melodic and harmonic parts. It visualizes notes on a piano keyboard grid.
- Double-click a MIDI region on a phần mềm Instrument track to open the Piano Roll.
- Click the grid to place notes — drag vertically to change pitch, horizontally to change duration.
- Use the Velocity tool (the pencil with an arrow) to draw dynamic variation into your performance.
- Press Cmd + Up/Down to transpose selected notes.
- Enable Flex Pitch (in the region parameter box) to enable per-note pitch correction and manipulation — this is a game changer cho vocal-like melodic lines.
Pro tip: Hold Option while clicking in the Piano Roll to draw multiple notes of the same length quickly.
Using Apple Loops: Drag-and-Drop Beat Building
Apple Loops are pre-edited, tempo-matched audio and MIDI loops that automatically conform to your project's BPM. This is the fastest way to build a complete beat without recording a single sound.
- Open the Loop Browser (click the Loop Browser icon or press O).
- Navigate to Apple Loops > Genre and select a category (e.g., Electronic, Hip-Hop, Rock).
- Use the search bar to filter by instrument, mood, or tempo.
- bản xem trước any loop by clicking it once — it plays at your current project tempo.
- Drag a loop trực tiếp onto an existing track, or drag to an empty area to create a new track automatically.
- Loops can be layered: add a drum loop, a bass loop, and a synth loop on separate tracks cho a nhanh skeleton of a song.
Apple Loops are also available as MIDI loops, which you can edit in the Piano Roll after placing them — giving you both speed and creative control.
The Mixer: Volume, Pan, and Basic Effects
Once you have arranged your regions, open the Mixer (X) to balance every element. Good mix is what tách a rough sketch from a polished beat.
Volume
Each track has a fader in the Mixer. Aim cho a balanced mix where the kick and snare sit clearly above the other elements, and no track is clipping (hitting 0 dB or higher — this causes distortion).
General starting point: set all faders to 0 dB, then adjust relative to each other. If the drums sound quieter than the melody, raise the drum fader. If the bass is muddying the mix, lower it.
Pan
Panning spreads sounds left and right across the stereo field. A centered kick and snare feel solid in the center; offsetting hi-hats slightly left and right creates width and space.
Basic pan setup cho a beat:
- Kick: center
- Snare: center
- Hi-hats: hard left and right (alternating)
- 808/Bass: center or slightly offset
- Melody: spread across the stereo field using the Stereo Spread knob
kênh Strip Effects
Every Mixer kênh has a full kênh strip with:
- EQ: Cut or boost specific frequencies. The kênh EQ plugin is built in.
- Compressor: Control động học. The Compressor plugin offers SSL-style compression.
- Reverb: Add space. Use Không gian Designer (convolution reverb) or ChromaVerb (algorithmic reverb) on a send.
- Delay: Add rhythm or atmosphere.
Right-click a kênh strip to insert a new effect. Logic Pro's stock effects are chuyên gia-grade — you do not need third-party plugins to get a solid mix.
Arranging Your Track in the Arrangement View
The Arrangement View is where you cấu trúc your beat into a full song. Most beats follow a simple cấu trúc: Intro > Verse > Chorus > Verse > Chorus > Outro or a repeating loop.
- Identify your loop section (usually 4 or 8 bars) that contains your core drums and melody.
- Copy and paste this region to build out the arrangement: Verse 1: 8 bars; Chorus: 8 bars; Verse 2: 8 bars; Chorus: 8 bars; Outro: 4–8 bars.
- Use the Scissors tool (S) to split regions at specific bar lines.
- Use the Glue tool (G) to combine adjacent regions.
- Add variation: copy a verse region but delete the drums cho a "vocal break" or "beat drop."
- Double-click the background of the Arrange area to create a marker (M) cho each section — this keeps your arrangement organized.
Logic Pro also has Track Stacks, which let you collapse multiple tracks into a single folder track. Use this to group all your drums into one Track Stack, or all your background vocals. This cleans up the Arrange area and lets you mute or solo entire sections with one click.
Exporting Your Beat: Bouncing to Audio
Khi your beat is arranged and mixed, it is time to bounce (xuất file) it to an audio file you can share, upload, or sell.
- Press Cmd + A to select all regions in the Arrange area.
- Go to File > Bounce > Project or Phần to Audio File.
- Trong quy trình the Bounce dialog: Format: Select AIFF or WAV cho highest quality. chọn MP3 if file size quan trọng more. Sample Rate: 44.1 kHz is the standard cho nhạc; 48 kHz is used cho video. Bit Depth: 24-bit cho mix/mastering; 16-bit cho final phân phối. Real Thời gian: Toggle Off cho faster bouncing (computers are fast enough năm 2026).
- chọn your destination folder and filename.
- Click Bounce — Logic Pro renders your project to audio.
Your exported beat is ready to upload to BeatStars, Airbit, SoundCloud, or sell trực tiếp from your own store.
Ready to level up your productions? Download free sample packs at Plugg Supply and supercharge your Logic Pro quy trình with premium drum kits, melodic loops, and 808s ready to drop straight into your next beat.
Tải miễn phíを見るLearning path
Related answer hubs
Tools
Software and plugins for this workflow
Plugins, DAWs and production tools connected to the workflow covered in this article.
![Apple Logic Pro v12.0.1 U2B [MacOSX]](/images/posts/apple-logic-pro-80832-326w.avif?v=20260630)
![Solid State Logic Fusion Stereo Image v1.0.21 [WiN]](/images/posts/solid-state-logic-fusion-stereo-image-34024-326w.avif?v=20260630)
![Solid State Logic SSL Native Plugins v6.5.30 [WiN]](/images/posts/solid-state-logic-ssl-native-plugins-27318-326w.avif?v=20260630)
article.relatedTitle
![Singing Success 360 The Complete Method (SS360) [TUTORiAL]](/images/posts/singing-success-360-the-complete-method-ss360-84348-326w.avif?v=20260630)
Singing Success 360 The Complete Method (SS360) [TUTORiAL]
![Udemy Pop and RnB Music Production with Ableton Live 12 [TUTORiAL]](/images/posts/udemy-pop-and-rnb-music-production-with-ableton-live-12-84361-326w.avif?v=20260630)
Udemy Pop and RnB Music Production with Ableton Live 12 [TUTORiAL]
![On Point Samples The Industrial Rawstyle Kick System [WAV, Synth Presets, TUTORiAL, DAW Templates]](/images/posts/on-point-samples-the-industrial-rawstyle-kick-system-84280-326w.avif?v=20260630)
On Point Samples The Industrial Rawstyle Kick System [WAV, Synth Presets, TUTORiAL, DAW Templates]
![Udemy Learn Piano The Easy Way A Beginner's Guide [TUTORiAL]](/images/posts/udemy-learn-piano-the-easy-way-a-beginners-guide-84213-326w.avif?v=20260630)
Udemy Learn Piano The Easy Way A Beginner's Guide [TUTORiAL]
![FaderPro The One Hour Mixing Workflow [TUTORiAL]](/images/posts/faderpro-the-one-hour-mixing-workflow-84119-326w.avif?v=20260630)
![Truefire Polyrhythm and Advanced Rhythm Training (JamPlay) [TUTORiAL]](/images/posts/truefire-polyrhythm-and-advanced-rhythm-training-jamplay-84170-326w.avif?v=20260630)
Truefire Polyrhythm and Advanced Rhythm Training (JamPlay) [TUTORiAL]
Câu hỏi thường gặp
- Is Logic Pro only available on Mac?
- Yes. Logic Pro is an Apple-developed DAW and is exclusively available cho macOS through the Mac App Store. There is no Windows or Linux version. If you are a Windows user, consider FL Studio or Ableton Live as alternatives.
- Can I use third-party plugins in Logic Pro?
- Yes. Logic Pro supports AU (Audio Unit) plugins exclusively — it does not support VST or VST3 formats. Most third-party developers ship plugins in AU format cho macOS. To install AU plugins, place them in /Library/Audio/Plug-Ins/Components/ on your Mac.
- Is there a free version of Logic Pro?
- Logic Pro does not offer a free tier, but it does include a free 90-day trial from the Mac App Store — no credit card required. After the trial, the full version costs $199.99 as a one-time purchase with lifetime updates included.
- Là gì: the difference between Logic Pro and Logic Pro cho iPad?
- Logic Pro cho iPad is a separate companion app optimized cho touchscreen production. It shares many features with the desktop version but has a touch-first interface and works with iPadOS. They are sold separately and are not interchangeable.
- Does Logic Pro include a sound library?
- Yes. Logic Pro ships with an enormous built-in sound library including the complete Sound Library (gigabytes of instruments, loops, and samples), Alchemy presets, Drum Kit Designer kits, and the Không gian Designer convolution reverb impulse responses. The Sound Library một mình is worth hundreds of dollars in third-party content.